

.png)
Today we will be making freezer paper tee shirts! They are sooo much cheaper than buying shirts in the park and you can totally customize them! This process has been around forever and there are a million tutorial out there on how to do it. I think there are even instructions on the box of paper! Why not go ahead and add another to the mix?
I really enjoyed making these for my family for our last trip, and also for my husband to fulfill his side of the Bacon Treaty of 2013.
Wait, I haven't told you about the Bacon Treaty of 2013? Ooooh, wait till you hear about that one! Another time.
I really enjoyed making these for my family for our last trip, and also for my husband to fulfill his side of the Bacon Treaty of 2013.
Wait, I haven't told you about the Bacon Treaty of 2013? Ooooh, wait till you hear about that one! Another time.
Supplies Needed:
Fabric Paint 4.68 for 5 tubes
Freezer Paper $9.99
Scissors or Exacto knife
and of course Tee Shirts!
The very first step is washing and drying the shirts.
Lets start with an easy one
Mickey Silhouette
As I have mentioned my husband is a Grumpy Gus. In fact here he is wearing the shirt I made for him looking deceivingly un-grumpy. It's a rare sighting...
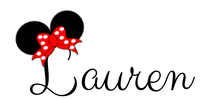
When I was making shirts for him to wear I wanted to be kind and at least make the shirts a little subtle. I decided to go faded red shirt with red paint. You can find pictures that will make great templates all over the internet! I picked this one, and printed it as an 8x10.

Cut a big enough piece of freezer paper to fit your design with at least a 2 inch border. Trace the image onto the paper side on the freezer paper and cut it out. You aren't so concerned with the center, the outside are is what needs to be smooth and even.
Find the center of your stencil and shirt, then carefully line them up slick side down. Iron the freezer paper onto the shirt.
Once the shirt cools, place another sheet of freezer paper (slick side up) inside your shirt. This will prevent and paint from seeping through and bleeding onto the back of the shirt.
Start painting from the outside in. Be very careful at the edges, making sure not to let paint find its way under the freezer paper. This will help keep clean lines when you pull the paper off.
Let the paint dry. Touch up or add another layer if needed. Once the paint is dry, peel off the freezer paper and enjoy!
Mickey Face:

I used the same image for another shirt, but wanted the detail in his face. The hardest part about this is figuring out what is negative space. The best way I can explain it is when looking at your outline cut out anything you want to be painted. I cut out his eyes, mouth, and nose and ironed them on with the outline.


Kermit:

Kermit took a little more creativity. This one required me to layer the freezer paper so I could fill in different parts. I cut the whole stencil out except the eyes, and set aside the mouth. Next, I ironed on the stencil and mouth and painted everything green. Once green dried I removed all the stencils. I free handed in the eyes with white and painted the mouth red. Once that dried I free handed the black mouth outline, tongue, and eye slits.

Super cute!
Pirate Mickey:
 I used the same technique as the Mickey Face one, but instead of paint I used a mix of water and bleach in a spray bottle. I ruined one shirt because I didn't stop the bleaching fast enough. Take the paper stencil off as soon as you finish spraying it. Also, as soon as it is a color you like put it in the washer! I picked to iron on the design and bleach around it instead of ironing on a stencil and bleaching inside it.


Mike Wazowski:
This one I totally free handed. The biggest mistake I made here was using acrylic paint instead of fabric paint. It didn't wash well at all. I loved the idea of it though. Poor Mike, he can never get a good picture of his face!

Here are a two more that I made:


You all know how I feel about Up. I loved these two shirts. We wore them on the same day. Awww...
Freezer Paper $9.99
Scissors or Exacto knife
and of course Tee Shirts!
The very first step is washing and drying the shirts.
Lets start with an easy one
Mickey Silhouette
As I have mentioned my husband is a Grumpy Gus. In fact here he is wearing the shirt I made for him looking deceivingly un-grumpy. It's a rare sighting...
 |
| This was the first one I made and it is slightly off center. Make sure you find the center of both the shirt and stencil. |
When I was making shirts for him to wear I wanted to be kind and at least make the shirts a little subtle. I decided to go faded red shirt with red paint. You can find pictures that will make great templates all over the internet! I picked this one, and printed it as an 8x10.
Cut a big enough piece of freezer paper to fit your design with at least a 2 inch border. Trace the image onto the paper side on the freezer paper and cut it out. You aren't so concerned with the center, the outside are is what needs to be smooth and even.
Find the center of your stencil and shirt, then carefully line them up slick side down. Iron the freezer paper onto the shirt.
Once the shirt cools, place another sheet of freezer paper (slick side up) inside your shirt. This will prevent and paint from seeping through and bleeding onto the back of the shirt.
Start painting from the outside in. Be very careful at the edges, making sure not to let paint find its way under the freezer paper. This will help keep clean lines when you pull the paper off.
Let the paint dry. Touch up or add another layer if needed. Once the paint is dry, peel off the freezer paper and enjoy!
Mickey Face:
I used the same image for another shirt, but wanted the detail in his face. The hardest part about this is figuring out what is negative space. The best way I can explain it is when looking at your outline cut out anything you want to be painted. I cut out his eyes, mouth, and nose and ironed them on with the outline.
Kermit:
Kermit took a little more creativity. This one required me to layer the freezer paper so I could fill in different parts. I cut the whole stencil out except the eyes, and set aside the mouth. Next, I ironed on the stencil and mouth and painted everything green. Once green dried I removed all the stencils. I free handed in the eyes with white and painted the mouth red. Once that dried I free handed the black mouth outline, tongue, and eye slits.
Super cute!
Pirate Mickey:
Mike Wazowski:
This one I totally free handed. The biggest mistake I made here was using acrylic paint instead of fabric paint. It didn't wash well at all. I loved the idea of it though. Poor Mike, he can never get a good picture of his face!
Here are a two more that I made:
You all know how I feel about Up. I loved these two shirts. We wore them on the same day. Awww...
I hope this gives you some ideas for your next trip!
No comments:
Post a Comment